

Some users don’t know how to backup their GitLab repositories and projects.
Sadly, GitLab hasn’t provided its users an optimal solution to back up their data, putting their users at risk of losing their critical business data in the event of cyber attacks, system failures, etc.
It’s because of this that some GitLab users endeavored to create their own backup solutions, which are often faulty and cause even more problems.
This comprehensive guide covers what you need to know about GitLab backups, including several easy-to-follow steps to backup your GitLab data.
Why should you learn how to backup Gitlab BackupGitlab?
GitLab is an essential tool for developers and project managers because it allows users to maintain repositories and perform project tasks efficiently.
Several companies using GitLab to store their applications have experienced massive data losses due to unexpected system failures.
Moreover, factors such as daily updates can often cause data loss, making it crucial to have GitLab backups to protect you from severe damages or consequences should they occur.
However, performing GitLab backups isn’t always a walk in the park since the tool doesn’t have comprehensive backup solutions. It also doesn’t provide any clear guidance on how to backup and restore your data.
The good news is there are other effective ways on how to backup GitLab data conveniently, without you doing much effort.
TL;DR: Learn how to backup Gitlab automatically
Backing up GitLab can be frustrating, especially when you have to do everything by yourself.
You’re better off learning how to backup GitLab automatically using Backrightup. Our platform helps streamline your process by letting you run GitLab backups with minimum effort.
Set up the backup once, and the platform runs your GitLab backups automatically, doing the heavy lifting for you.
Automatic backups help maintain projects and repositories easily without taking up much of your time and energy. Your GitLab data archive is also automated, reducing the chances of anything going missing.
How to backup GitLab manually
The steps below outline how to backup GitLab manually.
You can use two commands to create GitLab backups, depending on how the application was installed.
For Omnibus installation
If you installed Gitlab using the omnibus installation method, use this command:
$ sudo gitlab-rake gitlab:backup:create
For Source installation
Use the command below if you installed GitLab via the source package.
$ sudo -u git -H bundle exec rake gitlab:backup: create RAILS_ENV=production
You can back up the following using one of the commands above:
- Databases
- Attachments
- Git repositories data
- CI/CD job output logs
- CI/CD job artifacts
- LFS objects
- Container Registry images
- GitLab Pages content
Note: The manual process will not back up your configuration files, SSL certificates, or system files. You can use the environment variable SKIP to exclude some options from the backup process.
The list of options you can skip in the backup are:
- db (database)
- uploads (attachments)
- repositories (Git repositories data)
- builds (CI job output logs)
- artifacts (CI job artifacts)
- lfs (LFS objects)
- registry (Container Registry images)
- pages (Pages content)
If you want to skip some files while backing up others, use the following commands:
For Omnibus Package
sudo gitlab-backup create SKIP=db,uploads
For GitLab version 12.1 and earlier, use this command:
gitlab-rake gitlab:backup:create
For Source Package
sudo -u git -H bundle exec rake gitlab:backup:create SKIP=db,uploads RAILS_ENV=production
The backup process will start as soon as you execute these commands. It will look something like this:
Dumping database tables:
– Dumping table events… [DONE]
– Dumping table issues… [DONE]
– Dumping table keys… [DONE]
– Dumping table merge_requests… [DONE]
– Dumping table milestones… [DONE]
– Dumping table namespaces… [DONE]
– Dumping table notes… [DONE]
– Dumping table projects… [DONE]
– Dumping table protected_branches… [DONE]
– Dumping table schema_migrations… [DONE]
– Dumping table services… [DONE]
– Dumping table snippets… [DONE]
– Dumping table taggings… [DONE]
– Dumping table tags… [DONE]
– Dumping table users… [DONE]
– Dumping table users_projects… [DONE]
– Dumping table web_hooks… [DONE]
– Dumping table wikis… [DONE]
Dumping repositories:
– Dumping repository abcd… [DONE]
Creating backup archive: $TIMESTAMP_gitlab_backup.tar [DONE]
Deleting tmp directories…[DONE]
Deleting old backups… [SKIPPING]
Once the process is done, it creates an archive named “[TIMESTAMP]_gitlab_backup.tar” in the backup directory. The TIMESTAMP indicates when the backup creation date and the GitLab version used.
The default backup directory in GitLab is “/home/git/gitlab/tmp/backups”
How to backup GitLab automatically?
Automated backups free you from the manual process, ensuring you backup everything without losing too much time and effort.
One way to automate backups is to use Cron Jobs. These allow you to schedule your backup for regular intervals and prevent data loss.
Using Omnibus Installation
1. Edit a crontab for a root user.
sudo su-
crontab -e
2. Use the command to schedule a specific time, such as 2 AM.
0 2 * * * /opt/gitlab/bin/gitlab-backup create CRON=1
Using Source Installation
1. Edit crontab for git user.
Sudo -u git
Crontab -e
2. Use the command below:
0 2 * * * cd/home/git/gitlab && PATH=/usr/local/bin:/usr/bin:/ bin bundle exec rake gitlab:backup:create RAILS_ENV=production CRON=1
A better automated backup option to use is Backrightup, a software that can maintain your repository backups and provide you with all the updates efficiently.
The following steps show how to backup all data from GitLab:
1. Sign up for a Backrightup account on the website and log in.
2. Once logged in, your GitLab repositories and other data start backing up automatically.
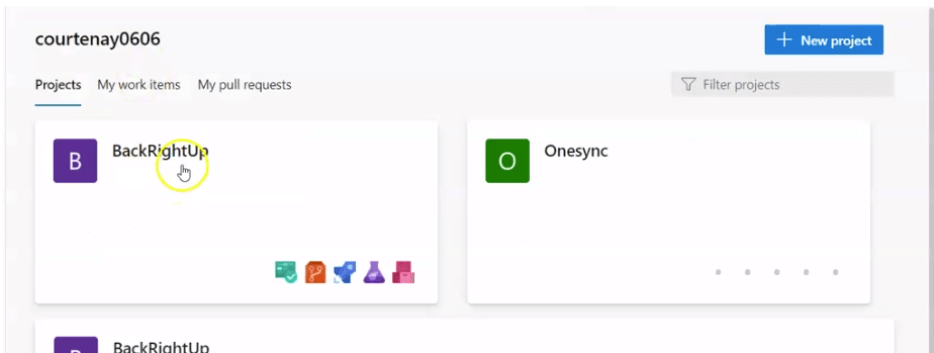
3. To view your GitLab projects and backup process, go to projects and select the Backrightup option.
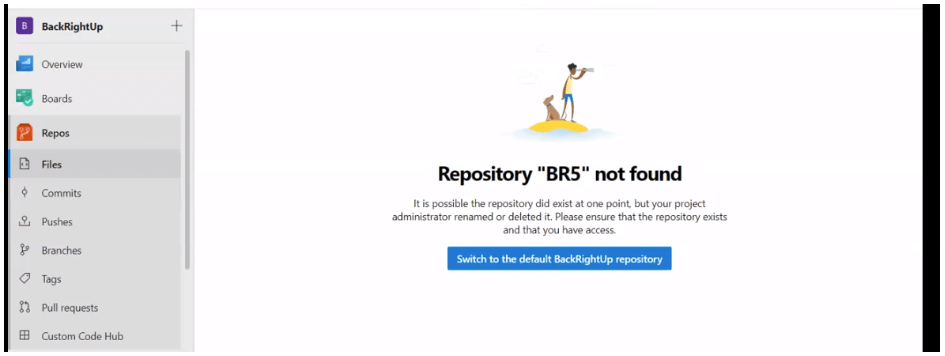
4. A menu appears on the left side of the screen. From here, you can manage all your GitLab data.
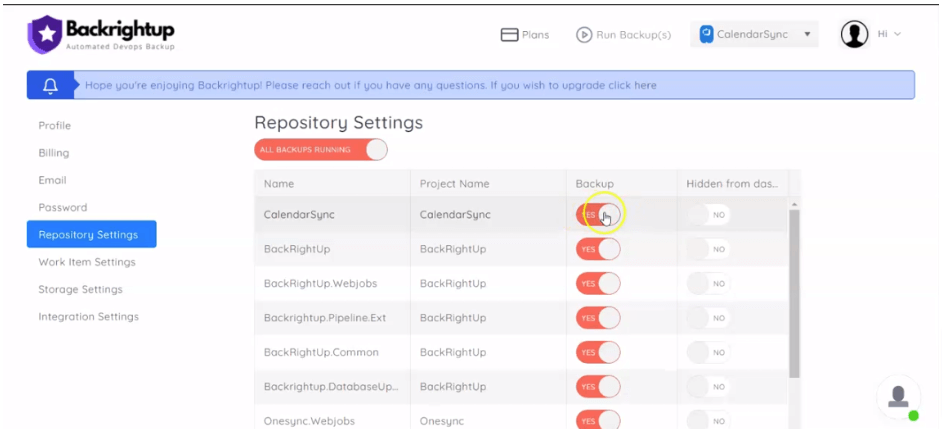
5. You can also choose which repositories and data files you want to backup. Go to Settings > Repository Settings. Under the backup column, click the “Yes” option to enable backups.
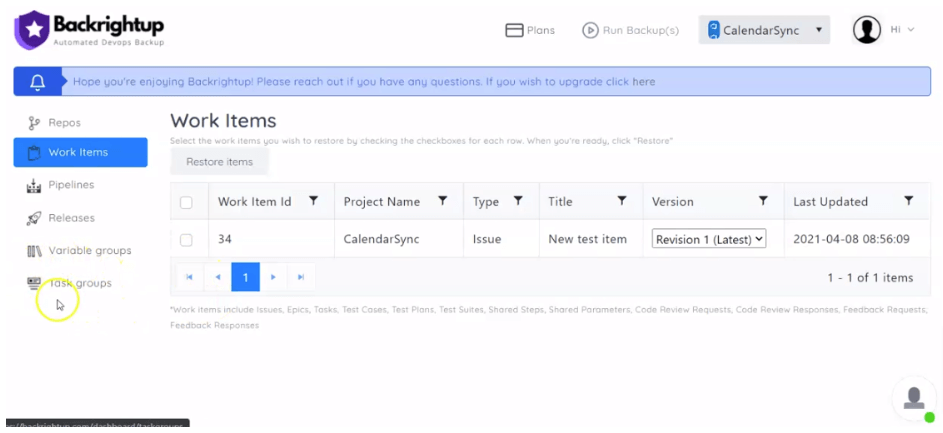
6. Ensure you restore your GitLab backups too. Backrightup provides options that allow you to fix the backup items.
The Restore option is available at the top of the table displaying backup updates.
Wrapping up the tips on how to Backup GitLab
Gitlab provides a digital space for professionals to collaborate and manage projects.
As such, backing up your data on GitLab is crucial because of the risks of server crashes leading to data loss.
Follow the steps in this article to learn how to backup all data from GitLab and work with your files without any trouble.